
Lately in the Tinkering Studio we’ve been thinking about how to translate the work that we do in the museum to settings like after school programs and community centers. Cardboard Automata is one of our most "venerable" activities: it started as part of the PIE project, and so we've had quite a long time to experiment with it, and have developed some expertise on how to successfully organize and facilitate it.
 At its core, cardboard automata is an exploration of basic mechanisms of gears, cams, and linkages, which are fundamental building blocks in many kinetic creations and simple machines. What is different and "tinkerable" about this activity is the personalization and creative expression that happens once the motion component of the automaton has been completed. By combining elements of artistic and aesthetic expression with traditional building components, the line between science, art, and craftsmanship is blurred in a way that generates ideas, which can be realized by building a physical representation of a line of thought and inquiry.
Space setup In contrast with many of our activities, cardboard automata benefits from an initial step-by-step coaching on how to put together the structure of the box that sustains the cams and followers. In order to work well, not only has the box to be sturdy and fairly square, but the axles on which the cams and followers are inserted need to be centered and at right angles with each other, and there are several other small steps that make a big difference. So, it will be helpful to keep this in mind when organizing the space in which you will work and facilitate. Normally we like to sit at round tables so that we can all be working at the same level, but for this activity it's okay to have a more clearly defined "facilitators" side and a "participants" side.
Something we've tried in the past that has worked well was a "U" configuration of tables, with participants on the outside and facilitators on the inside.
Materials First of all you will need to collect cardboard boxes to make the structure of the automata. Luckily these are not hard to come by, and free! However, pay attention to the size of the boxes. Experiment on your own to find a size that works well with the rest of the materials, and you might want to keep the size between boxes fairly consistent. We buy bulk quantities of 6"x6" boxes, cut off the flaps to make other parts, and slice each flat box in half; this way, we get two automata for each box.
Another crucial component is the "foamie", a foam material that has just the right amount of friction and rigidity to work very well as both a cam and a follower, yet is easy to cut and shape with just scissors or exacto knives. They come in thin and thick varieties, and I suggest you get both: the thick ones you'll use for the cams, and the thin ones as decoration materials.
Other helpful materials include skewer sticks to work as axles, and a variety of decorative materials, such as pipe cleaners, feathers, foam balls, google eyes, etc. Building tools are not too elaborate either: scissors, exacto knives, masking tape, hot glue guns, rulers and protractors are all you really need.
Examples With Cardboard Automata, providing clear and easy to follow examples of different types of motion is crucial; we usually set up five different examples, made with the materials that we provide to the visitors, that move:
- round and round
- up and down, and around
- up and down, back and forth
- straight up and down
- side to side
We usually encourage a visitor to try out all the different examples, get a feel for the motion, and then chose one to build. The first three are easier to build, and accomplish a remarkable range of motion with minimal variations in cam placement and setup, and therefore can be combined in a more elaborate automaton. The last two are more complicated to build.

In addition, it's very helpful to have a small selection of examples of completed automata, that span the range of complexity and "achievability" from completely achievable with the materials provided and within the time frame and skill level of the participants, to more ambitious and meant to serve as inspiration more than as a model to follow. So play around with the activity ahead of time, and keep the more inspiring fruits of your labors as examples; as you do this activity with kids, you might want to be on the lookout for particularly inspiring products, and ask the kids if you can keep them to let other people learn and be inspired from their example.
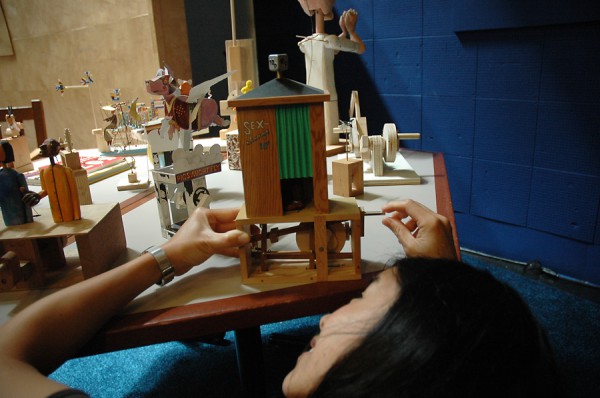
We have a collection of "professionally made" automata, from many different artists, and always try to display a few for inspiration. Look into the work of Cabaret Mechanical Theatre, in the UK, for an astounding collection of amazing automata. Most of them are artist's pieces and relatively expensive, but they also sell wooden kits that are inexpensive – plus, you get to assemble them yourself, gaining even more proficiency in the art of automata making! Another excellent way to build a collection of inspirational automata is to purchase and assemble paper automata kits. We are particularly enamored with Keith Newstead's work. And finally, look to your local community: making automata is an ages-old activity, and chances are there are some craftsmen or enthusiasts in your community already doing wonderful things with cams, linkages, and motions, who would love the chance to show some of their work outside their shop or garage!
Facilitation
The first bit of advice of course is: try it out a bunch of times before you offer this activity to others! It sounds obvious, but it is so crucial that I feel it bear spelling out loud. By building many automata yourselves, you will encounter most of the frustrating points that participants are likely to run into, and will know how to get them unstuck without giving them a pre-packaged answer to the problem in front of them. Pay particular attention to little tips and tricks like: using little foam bushings at the end of axles to keep the skewer from sliding out; adding weights to the cam follower to ensure a smooth motion; the perfect length of straw that will keep the vertical axle in place while still allowing for the full range of motion of the automata; ways of drawing perfect circles other than using a compass, like tracing round objects of various sizes that you might have around (yogurt cups, the inside and outside of masking tape rolls, etc.)
 Once you have the "technical" side of construction down, you will probably find that quite often the most difficult thing to facilitate is the transition between the problem-solving oriented mindset involved in construction, and the creative and expressive mindset required for the next phase: what to make this automata do! Here, a good selection of materials will prove very valuable: we tend to shy away from materials that are purely decorative – like crayons, markers, glitter, etc. – because we've found that they often end up disengaging kids from the construction aspect of the activity and plunge them into pre-existing play patterns like doodling, coloring, etc. Nothing wrong with that, but we believe the value of this activity is in constructing a physical solution and expression to an idea you have in mind, and so we keep our materials palette limited to things that you have to "do something to" in order to use them.
Expanding this activity
If you offer this activity repeatedly, or over a long period of time, you may want to start expanding the materials palette, and add some other elements that deepen the experience. Here are some ideas to play with:
- Radically change the scale of the automata. Cardboard comes in great big sizes; what would it be like to make an automaton the size of a refrigerator box? This could be a great collaborative project for all the kids to work on together, figuring out how to make a box of that size stable, what materials to use for cams and followers, and how to operate the whole contraption. On the other end of the scale, could you make automata that are very tiny, for example fitting in a match box?
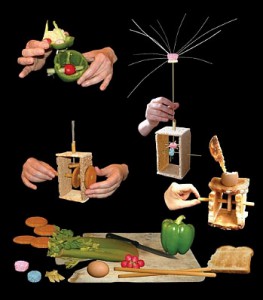
- Change the materials used for construction. Wood is a prime candidate for an alternative, but you can think even more laterally: what about scrounging for parts that can be adapted from the local dump, or recycling centers? Or you might decide to take apart a machine, like a typewriter, and make automata using parts salvaged from that. Or use food!
- Add technology. We are big fans of the PicoCricket: a tiny programmable computer that can greatly expand the realm of possibilities by adding sensors, displays, and motors that can be programmed to respond to inputs and interact with each other. One initial project might be to make a coin operated automaton!
Share!
Tell us what you’ve tried! We’re constantly experimenting with these activities and want you to try new things too. Let us know the discoveries you’ve made, innovations you’ve developed, puzzles you’ve encountered, and more!
For more information, here are links to the PIE Project PDF and the Tinkering Studio website’s Cardboard Automata Activity Page.