
Tinkering is all about using what you have around and messing about with everyday materials, but for some projects, you need a special little bit of something that is hard to find. For that reason, we have set up a vending machine in the Tinkering Studio where you can purchase these materials and other fun items to get you inspired and help you tinker when you get home.

Tinkering Vending Machine


A few examples of the products: Toothpick sculpture kit ($3), Paper circuits kit ($6), Sewn circuits kit ($6), and a hobby motor ($2.5)
This vending machine used to sell snacks, but Nicole turned it into a Tinkering vending machine when we moved to the current location. Ever since then, the vending machine has provided tinkering kits for visitors on the museum floor. People loved our vending machine, but the only downside was that the machine only accepts one dollar bills. This summer we upgraded this vending machine so it can take credit cards. I am going to write the process of upgrading as a documentation in this blog.
Know Your Machine:
It is important to know your vending machine's make and model. Ours is especially old and it doesn't come with an MDB protocol mechanism.
- Model: AP6600 Snack Machine
- Manufacture: Automatic Products Company
Get a Credit Card reader:

Upgrading the control board:
We also learned that we need to upgrade the vending machine’s control board (usually called VMC: Vending Machine Controller). Before this project, I didn’t even know what the control board was, but soon I realized that it was like an Arduino board that works like the brain of the machine (Well, it’s just bigger than those Arduino projects that I’m familiar with…)
The important thing is to make sure that you get the right kind of the board. There are many similar upgrading boards available on the market. We chose this particular one (Retrofit kit 6/7000 Machine) from a company called InOneTechnology because it is the only board that allows us to use old payment systems such as 110V pulse style coin/bill acceptors AND still let us add a new payment system such as a credit card reader through an MDB interface.
The control board is located inside of the vending machine door. At first, I was very intimidated to see all the circuitry on the board. I see 9 pin connectors, 6 pin connectors, ribbon cables, female-male connectors...etc. Ok, Where should I start!?

First things first, make sure you unplug the machine before you do any work to prevent electrical shock or damage to your machine. Then I disconnected all the wires and cables from the old board and took it down from the machine.


I also disconnected the coin acceptor, coin changer, and bill validator to access the selection panel (the keypad). During this process, it was really helpful to watch InOneTechnology’s tutorial video.

Click here to watch the Youtube video.
The video’s instruction were very clear and thorough, and also I received every possible help from Arnie at InOneTechnology (who is starring in this video! Thank you so much Arnie!) I was amazed many times by his expertise: he was able to point out what I was doing wrong just by looking at a few pictures that I sent or talking a little over the phone. Thanks to his support, I was able to install a new control board and re-wire cables to each part successfuly. Once I understood how everything is connected, I felt much more comfortable dealing with this circuitry.
Here is how we connected everything:


(Click the image to enlarge)
Installing a Credit card reader:
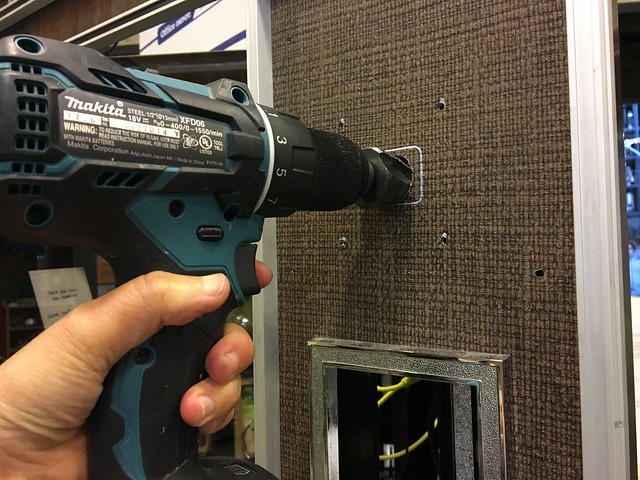
If you were able to install the control board successfully, most of the upgrading work is done! All you have to do is to connect and mount a credit card reader. For this part, the video from Parlevel Plus was helpful. And the fun part was drilling a hole in the metal surface of the vending machine!

Powering up the machine:
Once you have successfully installed the control board and card reader, you can finally plug in and power up the vending machine. It was such a rewarding moment to see the machine turn on without any issue! (Since the machine was handling 110v voltage, I felt so nervous at the moment.) Having made sure that nothing blew up, I tested with coins and bills to see if the machine would work in the same way it used to. Then I tested with a couple of credit cards to see if the machine could process the payment. And it did! It was such a journey for me to undertake this project and tackle the wiring of the vending machine!
We are looking forward to seeing how this upgrading will impact the vending machine's sales and how it will eventually contribute to the idea that people will bring their tinkering experience home and continue "tinkering at home"!